Introducing Nancy.OWin.Security.B2C
01/16/2018

We've released a NuGet package to simplify OpenID security against Azure AD B2C for Nancy OWin projects.
Today we're happy to announce the release of the Nancy.OWin.Security.B2C library, a NuGet package we built to help simplify the efforts behind implementing OpenID authentication using Azure AD B2C for web apps. A sample application is available at the GitHub repository at https://github.com/endpointsystems/Nancy.Owin.Security.B2C.
If you're interested in building a Nancy web app or API but aren't sure on how to get started, you can follow these instructions below, take a look at our sample code on GitHub or contact us and we'd be happy to help!
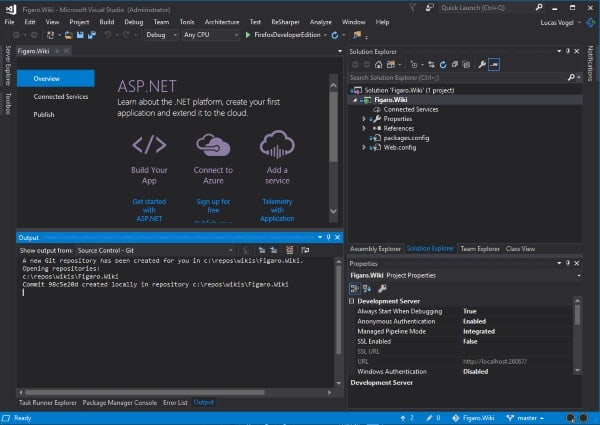
Let's take a quick walk through the process of implementing a Nancy OWIN application with the library. We're going to use our Figaro Wiki sample project. Figaro Wiki is a web application that uses Schema.org SEO data structures and markup for content and data storage using our own Figaro library, which gives us the Oracle Berkeley DB XML serverless database engine for our data back end. We'll post a link to the GitHub repository once it's up, and if you're interested in the project you'll be able to follow our progress here and at the Figaro blog site.
Let's get started!
Implementation
Build out an Azure Active Directory B2C instance in your Azure subscription with the policies you want to implement. For further instruction on how to get started with this, follow the instructions at https://docs.microsoft.com/en-us/azure/active-directory-b2c/active-directory-b2c-get-started.
Create an empty ASP.NET web application.
In the Package Manager Console, enter
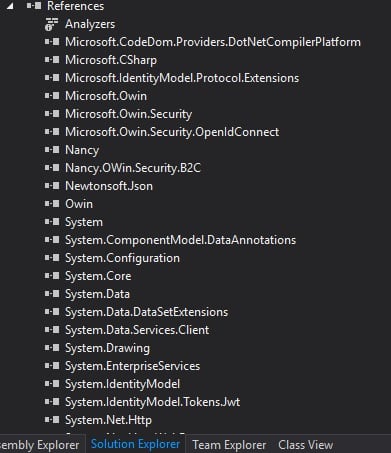
Install-Package Nancy.OWin.Security.B2C -Version 2.0.0.1779-clinteastwoodand hit Enter. This will add Nancy 2.0.0-clinteastwood, Nancy.Owin, and all of the other dependencies needed to set up your application as a Nancy web application.Run these additional commands:
Install-Package Nancy.Owin -Version 2.0.0-clinteastwood
Install-Package Nancy.Viewengines.Razor -Version 2.0.0-clinteastwood
Install-Package Microsoft.Owin.Security.Cookies
Install-Package Microsoft.Owin.Host.SystemWeb
Add three classes to your project - an OWIN Startup class, a custom Nancy bootstrapper, and a config class. The Nancy bootstrapper will inherit from
DefaultNancyBootstrapperand the config class will inherit fromNancy.OWin.Security.B2C.Util.IOpenIdAppConfig. We'll configure these in a few steps.Taking a look at your custom config helper, you will find a number of fields that need filling out -
Tenant,AppId,ReplyUrl,AppKey, etc.. Only theAuthorityfield is optional, but you can simply put/for yourpostLogoutRedirectUri,ResetPasswordUri,AccessDeniedUri, andErrorUrisettings for now. You will probably want to fill those in at some point in the future, however. To fill in the rest of the fields is up to you as far as how you want to implement. One quick-and-dirty strategy would be to create a Settings file in the project properties and put your field values in there. Here's what ours looks like: Two properties of note -
 PoliciesandCaption. ThePoliciesare aStringCollectionof policies created in your Azure AD B2C instance that you want users to have access to, while theCaptioncollection simply represents the caption for each policy.Now that we have our settings, we can map them to the config class, like this:
using Nancy.OWin.Security.B2C.Util;
using System.Collections.Specialized;
using Figaro.Wiki.Properties;

namespace Figaro.Wiki
{
  public class ConfigHelper: IOpenIdAppConfig
  {
    public string Tenant => Settings.Default.Tenant;
    public string AppId => Settings.Default.AppId;
    public string ReplyUrl => Settings.Default.ReplyUrl;
    public string AppKey => Settings.Default.AppKey;
    public string Scopes => Settings.Default.Scopes;
    public string Authority => Settings.Default.Authority;
    public string MetadataUri => Settings.Default.MetadataUri;
    public string PostLogoutRedirectUri => Settings.Default.PostLogoutRedirectUri;
    public string ResetPasswordUri => Settings.Default.ResetPasswordUri;
    public string AccessDeniedUri => Settings.Default.AccessDeniedUri;
    public string ErrorUri => Settings.Default.ErrorUri;
    public StringCollection Policies => Settings.Default.Policies;
    public StringCollection Captions => Settings.Default.Captions;
  }
}
- Now we can configure our
Startup.csto use OpenID and Nancy using these four lines of code:
using Microsoft.Owin;
using Microsoft.Owin.Security;
using Microsoft.Owin.Security.Cookies;
using Nancy.OWin.Security.B2C;
using Owin;

[assembly: OwinStartup(typeof(Figaro.Wiki.Startup))]

namespace Figaro.Wiki
{
  public class Startup
  {
    public void Configuration(IAppBuilder app)
    {
      app.SetDefaultSignInAsAuthenticationType("Cookies");
      app.UseCookieAuthentication(new CookieAuthenticationOptions());
      app.RegisterOpenIdConnectAuthPolicies(new ConfigHelper());
      app.UseNancy();
    }
  }
}
- At this point we're all loaded up for secure access. Using
Nancy.Razoras our view engine, let's set up our bootstrapper:
using System;
using System.Collections.Generic;
using Nancy;
using Nancy.ViewEngines.Razor;

namespace Figaro.Wiki
{
  public class WikiBootstrapper : DefaultNancyBootstrapper
  {
    protected override IRootPathProvider RootPathProvider { get; } = new WikiRootPath();

    protected override IEnumerable<Type> ViewEngines
    {
      get { yield return typeof(RazorViewEngine); }
    }


  }

  public class WikiRootPath : IRootPathProvider
  {
    public string GetRootPath()
    {
      return AppDomain.CurrentDomain.SetupInformation.ApplicationBase;
    }

  }
}
- After setting up some Razor views, we create and configure a module for our front end page:
using Microsoft.Owin.Security;
using Nancy;
using Nancy.OWin.Security.B2C.Extensions;
using Nancy.Responses;

namespace Figaro.Wiki.Modules
{
  public class MainModule: NancyModule
  {
    private readonly AuthenticationProperties props = new AuthenticationProperties
    {
      RedirectUri = "/"
    };

    public MainModule()
    {

      var helper = new ConfigHelper();

      Get("/",  args => View["Index"]);

      Get("/Claims",  args => View["Claims"]);

      Get("/Login", args =>
      {
        Context.GetAuthenticationManager().Challenge(props, helper.Policies[0]);
        return HttpStatusCode.Unauthorized;
      });
      Get("/Profile", args =>
      {
        if (Context.CurrentUser == null)
          return new RedirectResponse("/");
        Context.GetAuthenticationManager().Challenge(props, helper.Policies[1]);
        return (object) HttpStatusCode.Unauthorized;
      });
      Get("/SignOut", args =>
      {
        if (Context.CurrentUser == null)
          return new RedirectResponse("/");
        Context.GetAuthenticationManager().SignOut();
        return HttpStatusCode.Unauthorized;
      });

      Get("/Error{error}{error_description}",  args => View["Error"]);
    }

  }
}
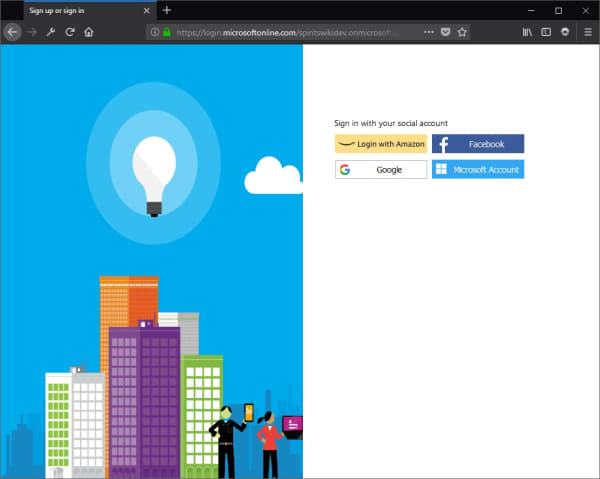
At this point, if you have everything connected, you should be able to sign in to your site using Azure AD B2C.
You now have a web application that uses OpenID for user authentication, cookies and tokens for user profile access, and no databases containing any personal information. Next up, we'll take a look at setting up an API back end for our web application, and how the authentication pieces work together.
Looking for help building or integrating your web application with Azure AD B2C? Contact us for a quote - not only is it free, but we can help you find what you're looking for at a better price than most consulting firms!